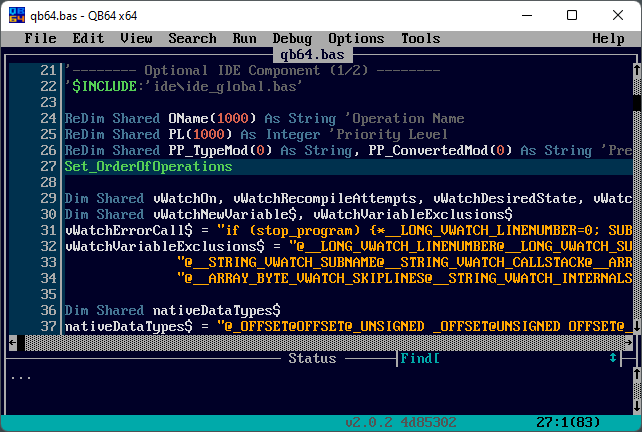
Towards the end of 2021, I was playing with QB64 and thought that its default color scheme—called Super Dark Blue—was quite neat. It reminded me of QuickBASIC, which is what the whole program is supposed to do, but the colors felt vivid and modern. Take a look:
“Naturally,” I wondered if I could adopt those colors in VSCode and Windows Terminal, as these are the apps I look at the most throughout a work day. I quickly ruled out VSCode because defining a theme seems non-trivial, but creating a scheme for Windows Terminal was very easy.
A blog on operating systems, programming languages, testing, build systems, my own software projects and even personal productivity. Specifics include FreeBSD, Linux, Rust, Bazel and EndBASIC.
![]()
![]()
![]()
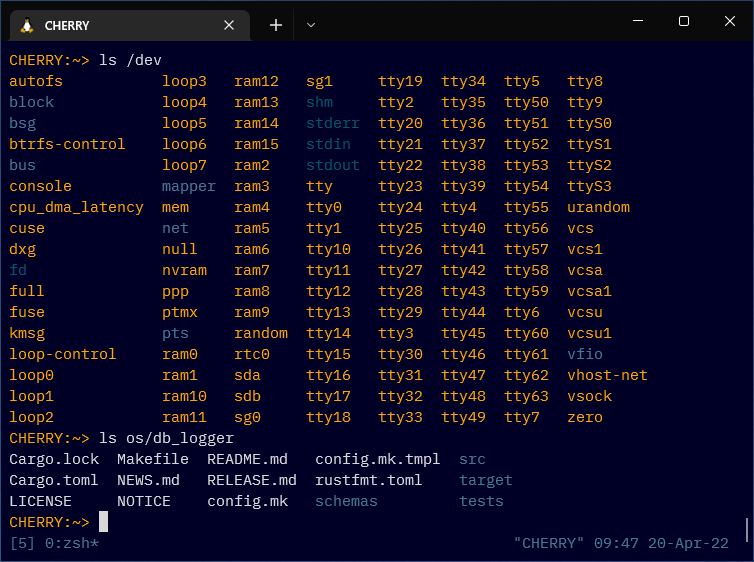
To create the Windows Terminal theme, I took the original QB64 colors, mapped them to the bright ANSI colors (numbers 8 through 15) and dialed their brightness down to come up with the dark colors (numbers 0 through 7). After that, I uploaded the theme to the Windows Terminal Themes site and called it a day.
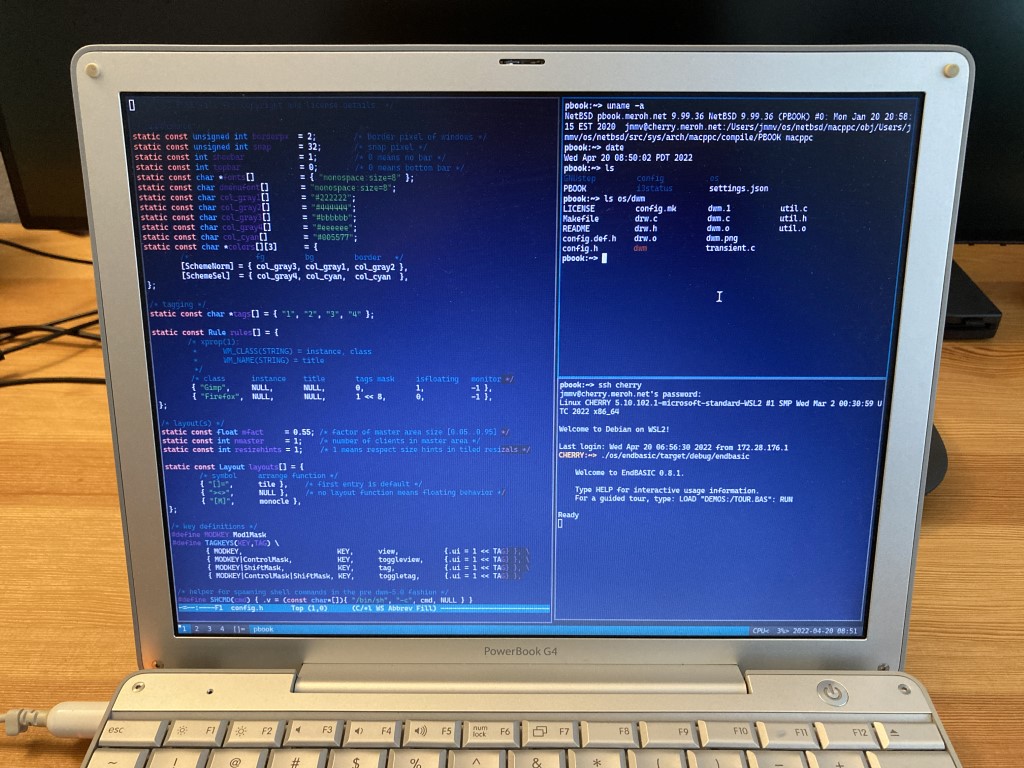
But just yesterday, I took out an old PowerBook G4 from the closet, which has NetBSD on it and that I had not touched for two years. As I was staring at the ugly color scheme I had previously configured, I thought: can I port those same colors to xterm?
Of course I can. In fact, I had previously done this almost 10 years ago when I ported Mac OS X’s Novel color scheme to xterm—which, by the way, is why I’m writing this post. Re-reading that old article from 2013 and seeing its screenshots made me nostalgic.
To create the xterm theme, I first took the configuration I had previously written for the Windows Terminal, which looks like this:
{
    "background": "#000027",
    "black": "#000000",
    "blue": "#054663",
    "brightBlack": "#626262",
    "brightBlue": "#457693",
    "brightCyan": "#00586C",
    "brightGreen": "#55CE55",
    "brightPurple": "#934593",
    "brightRed": "#D8624E",
    "brightWhite": "#D8D8D8",
    "brightYellow": "#FFA700",
    "cursorColor": "#D8D8D8",
    "cyan": "#00485C",
    "foreground": "#D8D8D8",
    "green": "#157E15",
    "name": "QB64 Super Dark Blue",
    "purple": "#631563",
    "red": "#98220E",
    "selectionBackground": "#00586C",
    "white": "#989898",
    "yellow": "#808000"
}
And mapped it to a set of X resources for ~/.Xresources, which looks like this:
!! QB64 Super Dark Blue
XTerm*background:     #000027
XTerm*foreground:     #D8D8D8
XTerm*color0:         #000000
XTerm*color1:         #98220E
XTerm*color2:         #157E15
XTerm*color3:         #808000
XTerm*color4:         #054663
XTerm*color5:         #631563
XTerm*color6:         #00485C
XTerm*color7:         #989898
XTerm*color8:         #626262
XTerm*color9:         #D8624E
XTerm*color10:        #55CE55
XTerm*color11:        #FFA700
XTerm*color12:        #457693
XTerm*color13:        #934593
XTerm*color14:        #00586C
XTerm*color15:        #D8D8D8
XTerm*cursorColor:    #D8D8D8
XTerm*highlightColor: #00586C
With that, I have a more pleasantly-looking X configuration on this little old machine, from which I’m typing this draft post.
Enjoy! And I hope to get nostalgic again when I encounter this post many years down the line 😊.


Featured software
Featured posts
- Fast machines, slow machines
- EndBASIC 0.10: Core language, evolved
- Farewell, Microsoft; hello, Snowflake!
- Rust is hard, yes, but does it matter?
- Rust traits and dependency injection
- A year on Windows: Introduction
- Always be quitting
- How does Google keep build times low?
- How does Google avoid clean builds?
- Unit-testing a console app (a text editor)
- More...
