Hello readers and sorry for the 2-month radio silence. I’ve been pretty busy at work, traveling during school breaks, hacking on EndBASIC when time permitted, and… as of two weeks ago… tinkering with 3D printing as a complete beginner. So, today, I’d like to walk you through the latter because it has been a really fun and rewarding journey, albeit frustrating at times.
You’d think that to use a 3D printer, you’d design a 3D model and then… just… send it to the printer? That’s almost true, but it ignores the realities of producing a physical object from an “abstract” model: when designing such a model, you need to take into account the limitations of 3D printing and you need to translate your model into something the 3D printer can understand via a process called slicing.
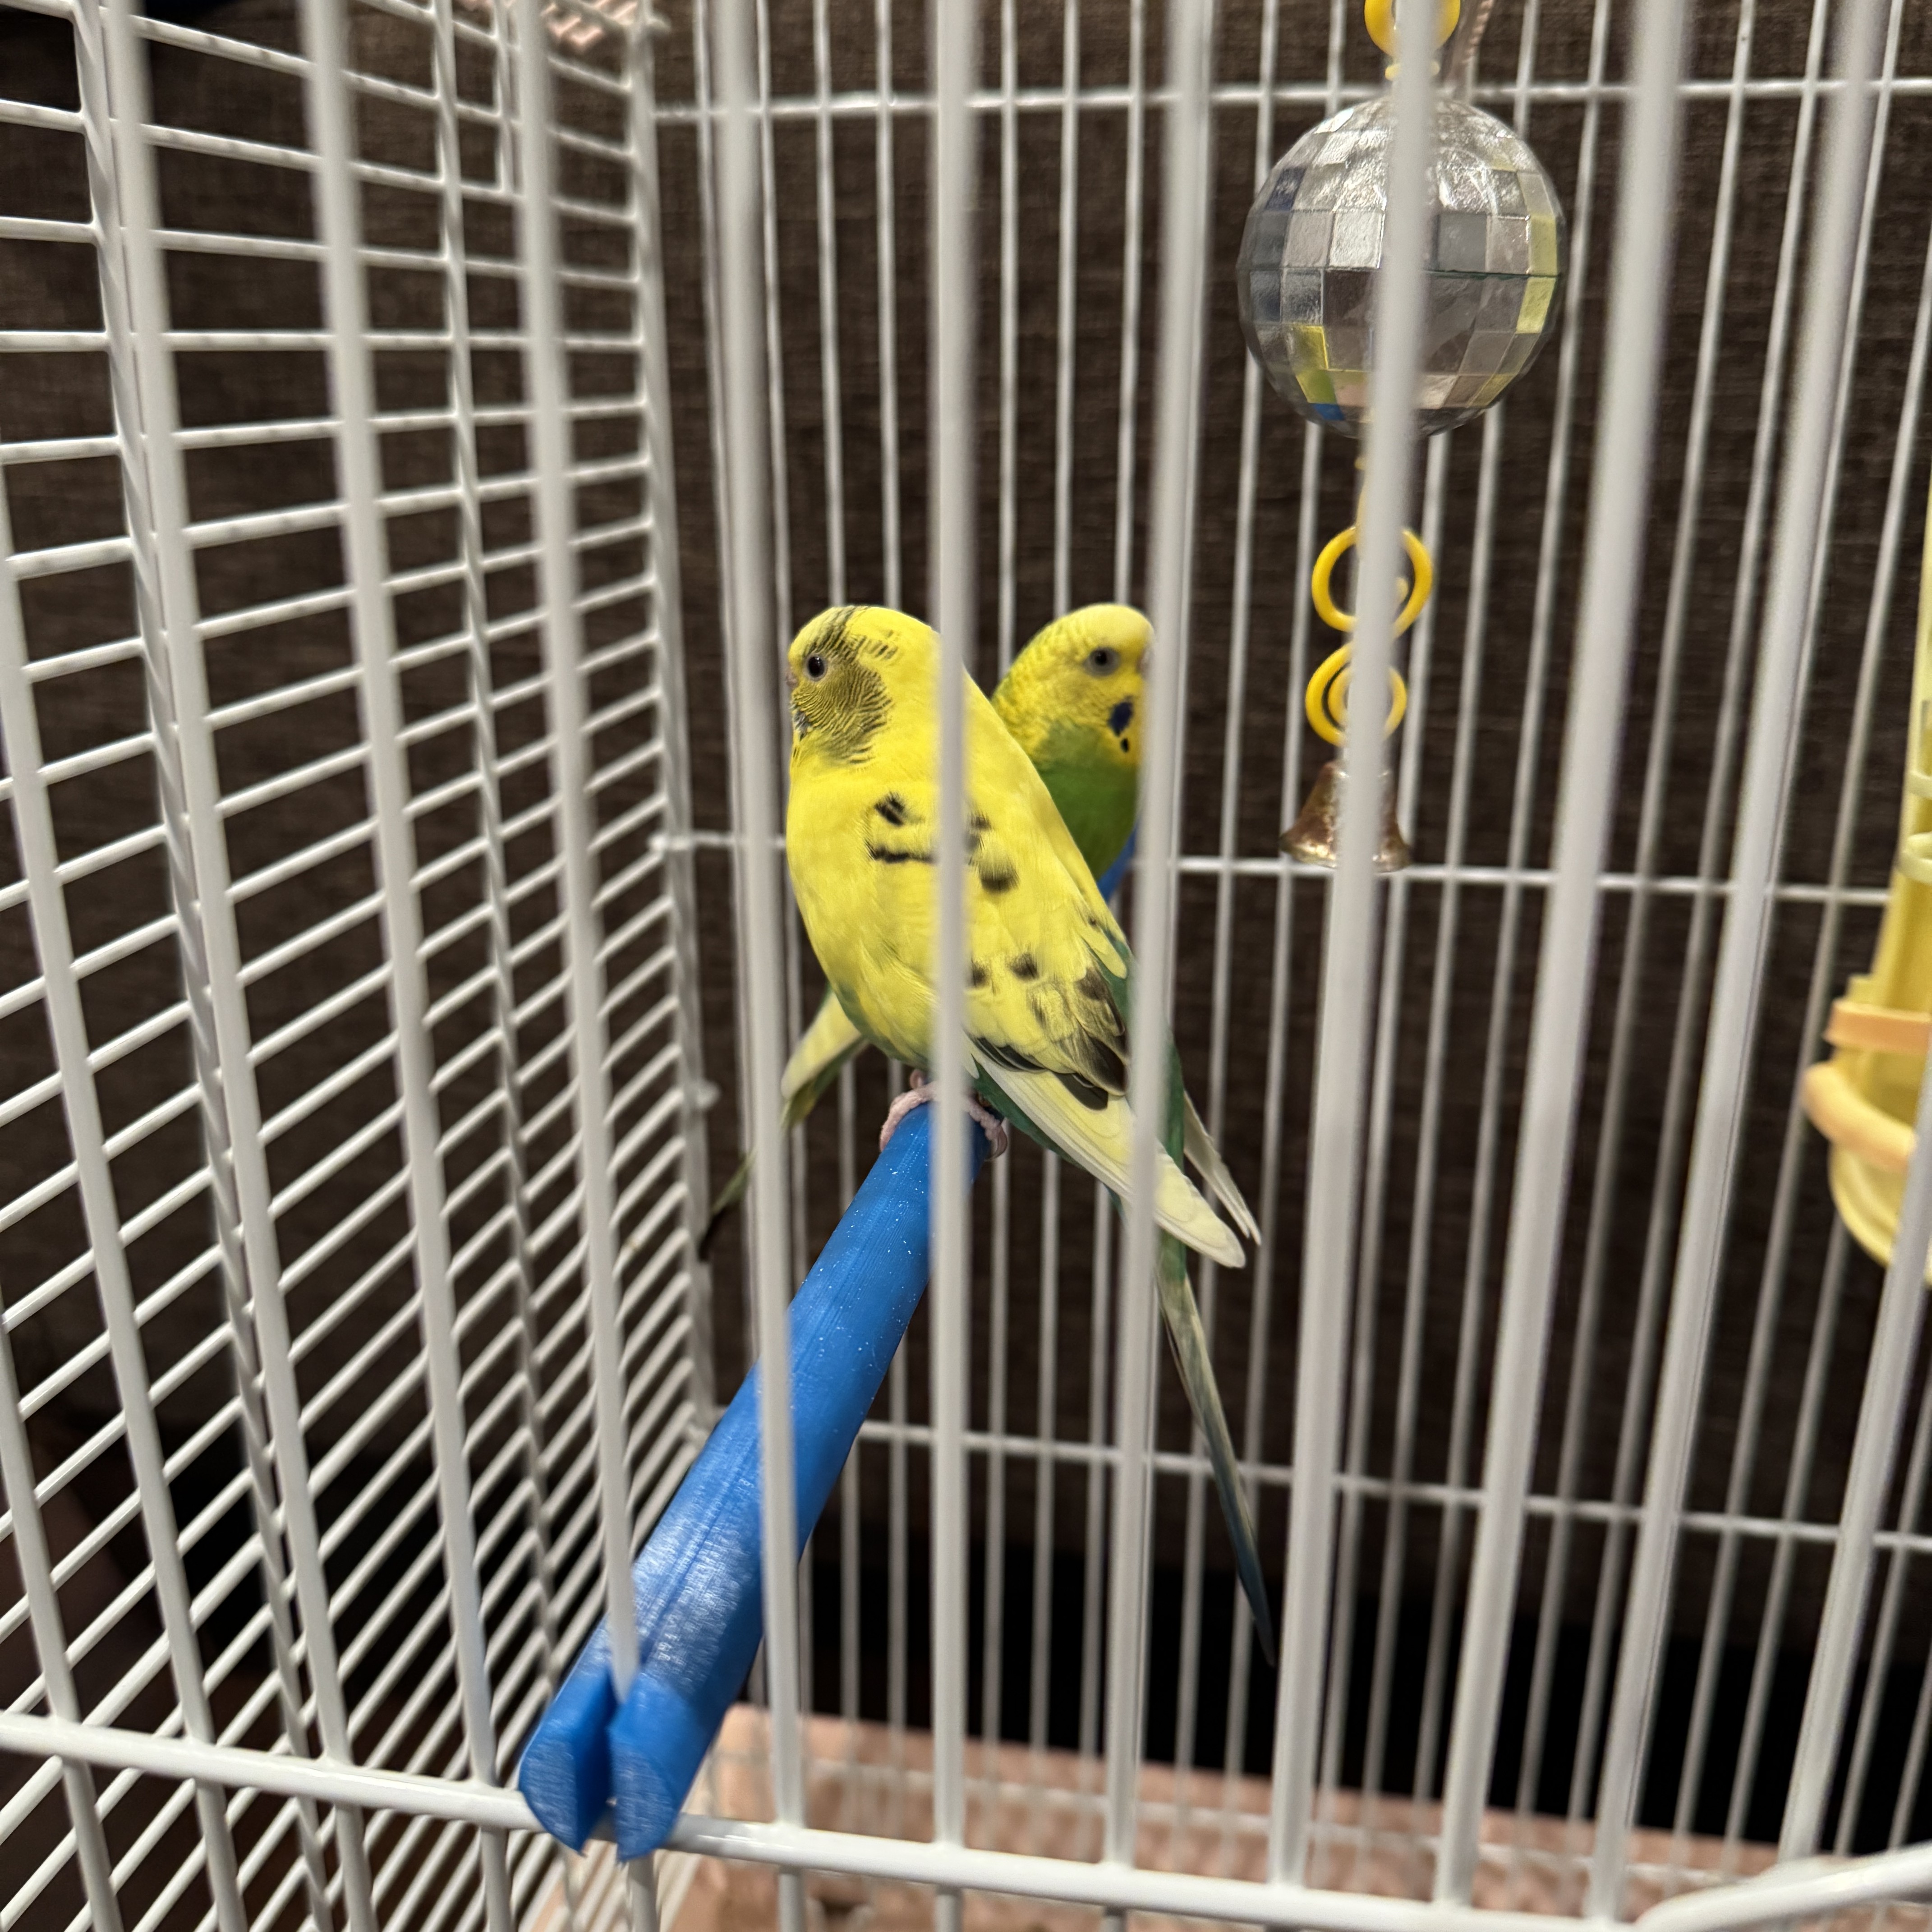
Let’s take a brief peek at all of these steps. I’ll assume you are a complete beginner like I am. The pictures I’ll show are all for a “first project” I did to remake the bars of a bird cage I have, as the birds had fully destroyed the previous ones.
Step 1: Modeling
The very first step in printing a 3D object is to create the model of what you want to print, of course. You might think that this is trivial, but there are two difficulties: the first lies in choosing and using the software, and the second lies in the physical constraints of 3D printing.
As for the software part, you’ll need a CAD program, and there are many to choose from. Here are the ones I considered:
FreeCAD is the free and open source solution. This is the first program I reached for given my preferences to favor free software but… oh my: if you have ever thought that the GIMP’s UI was difficult, you are in for a shock here. FreeCAD’s UI is not beginner friendly at all and it’s also not high-DPI friendly: the buttons that show up in my monitor are tiny, which brings a new meaning to hunt-and-peck. It seems extremely comprehensive though.
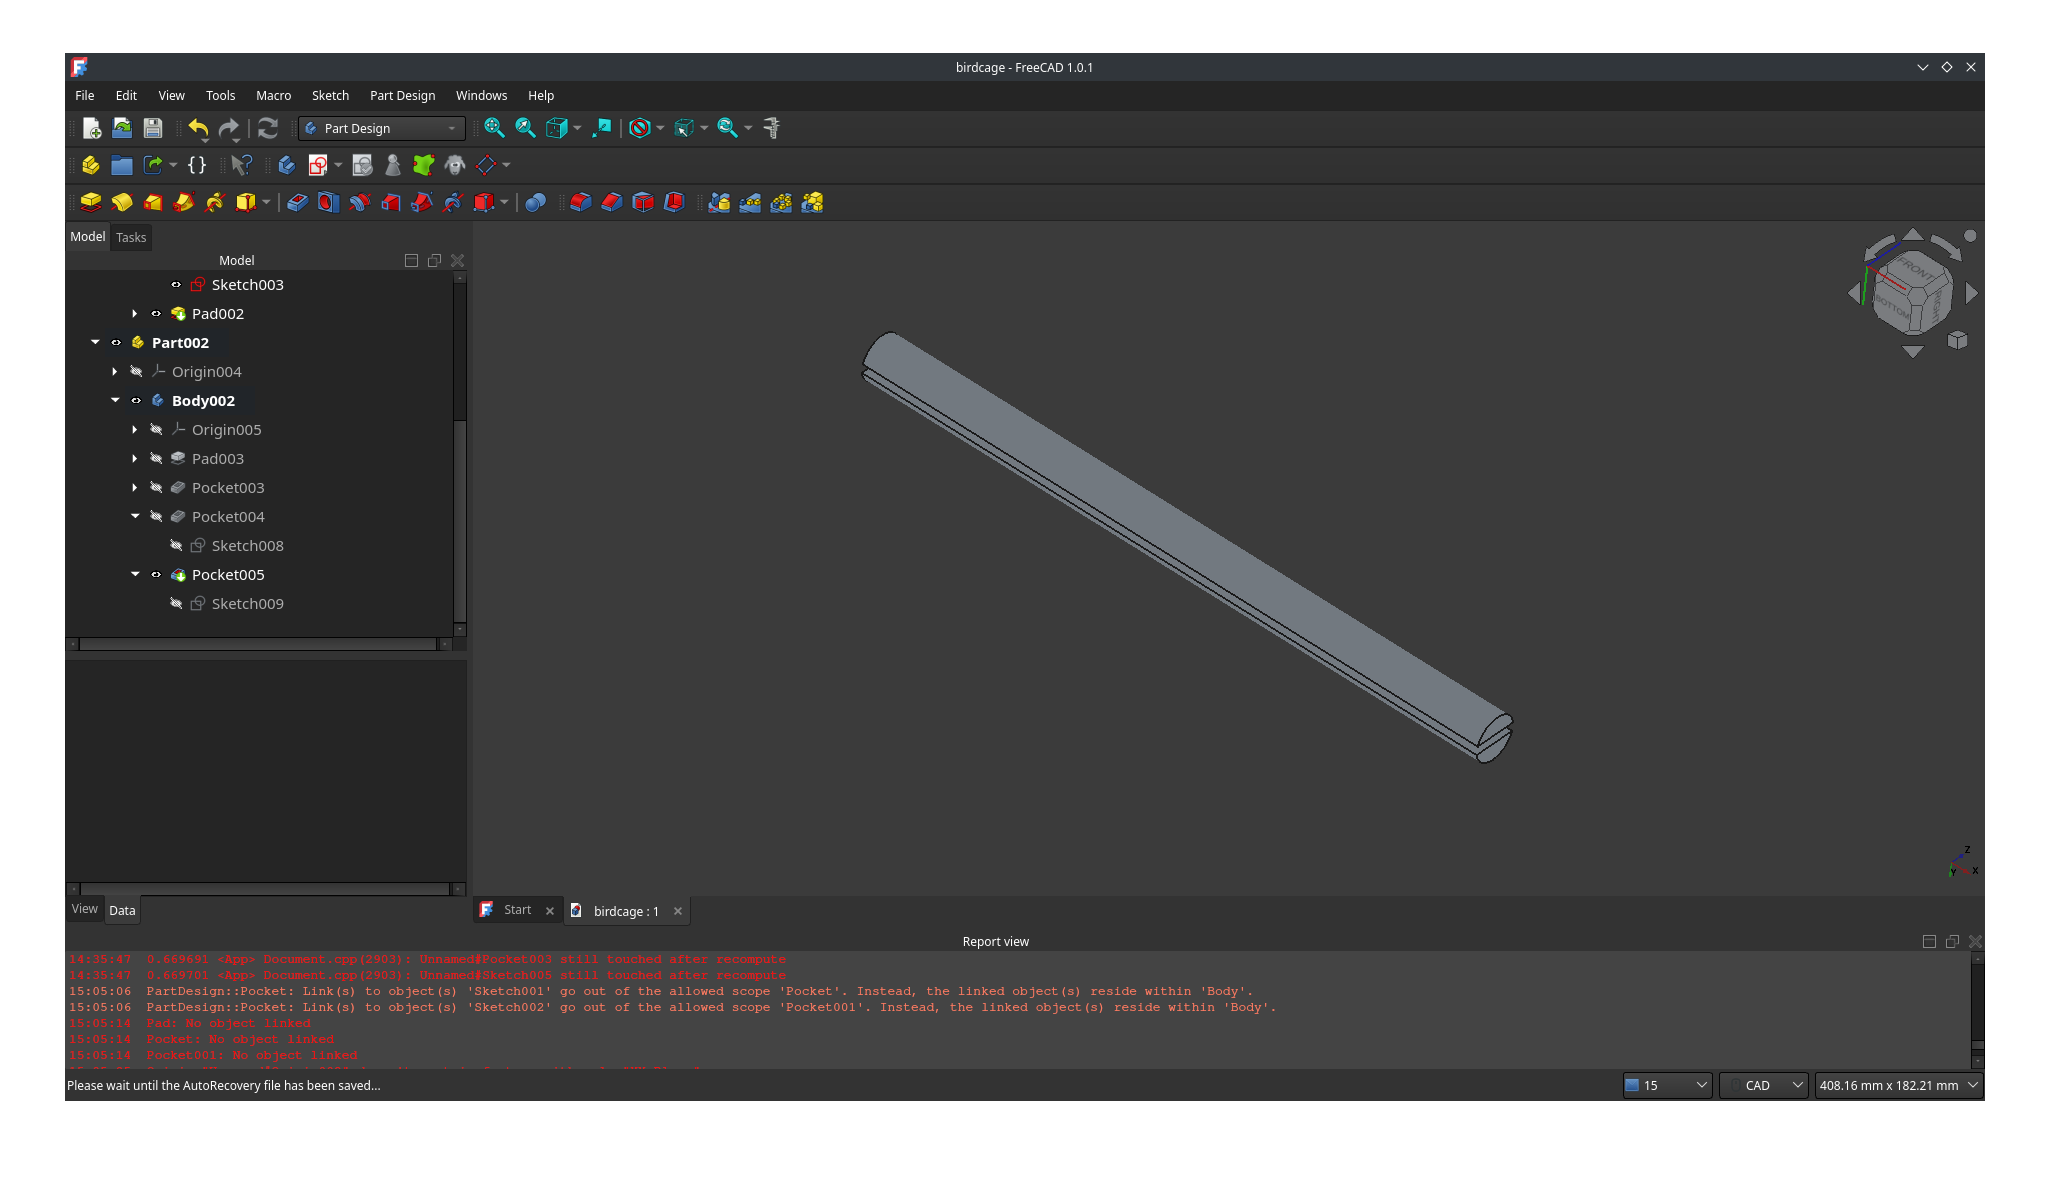
Simple FreeCAD project showing the design of a bar for a bird cage. Fusion 360 is Autodesk’s answer to 3D modeling. This is a product I did not know about: I had never done “Computer Assisted Design” before, and the only times I heard of this term were in the context of AutoCAD by the same company, so I was a little surprised to see that they have another flagship brand for 3D design. As it turns out, Fusion 360 is free for non-commercial use and for hobbyist use if your revenue is less than 1K a year. I chose to steer clear of this product because I did not want to be bound by these terms and I did not want to be tied to Windows or macOS.
TinkerCAD is another product from Autodesk, but this one is completely free and available as a web application. TinkerCAD is really well made and it is beginner friendly: after just a couple of minutes (literally), I was up and running designing my first model, and I have watched my kid come up with cool objects on his own with close to zero instructions. Unfortunately, as I made progress in my designs, I started suffering from its simplicity and by now I regret not having spent the time to learn FreeCAD from the get go.
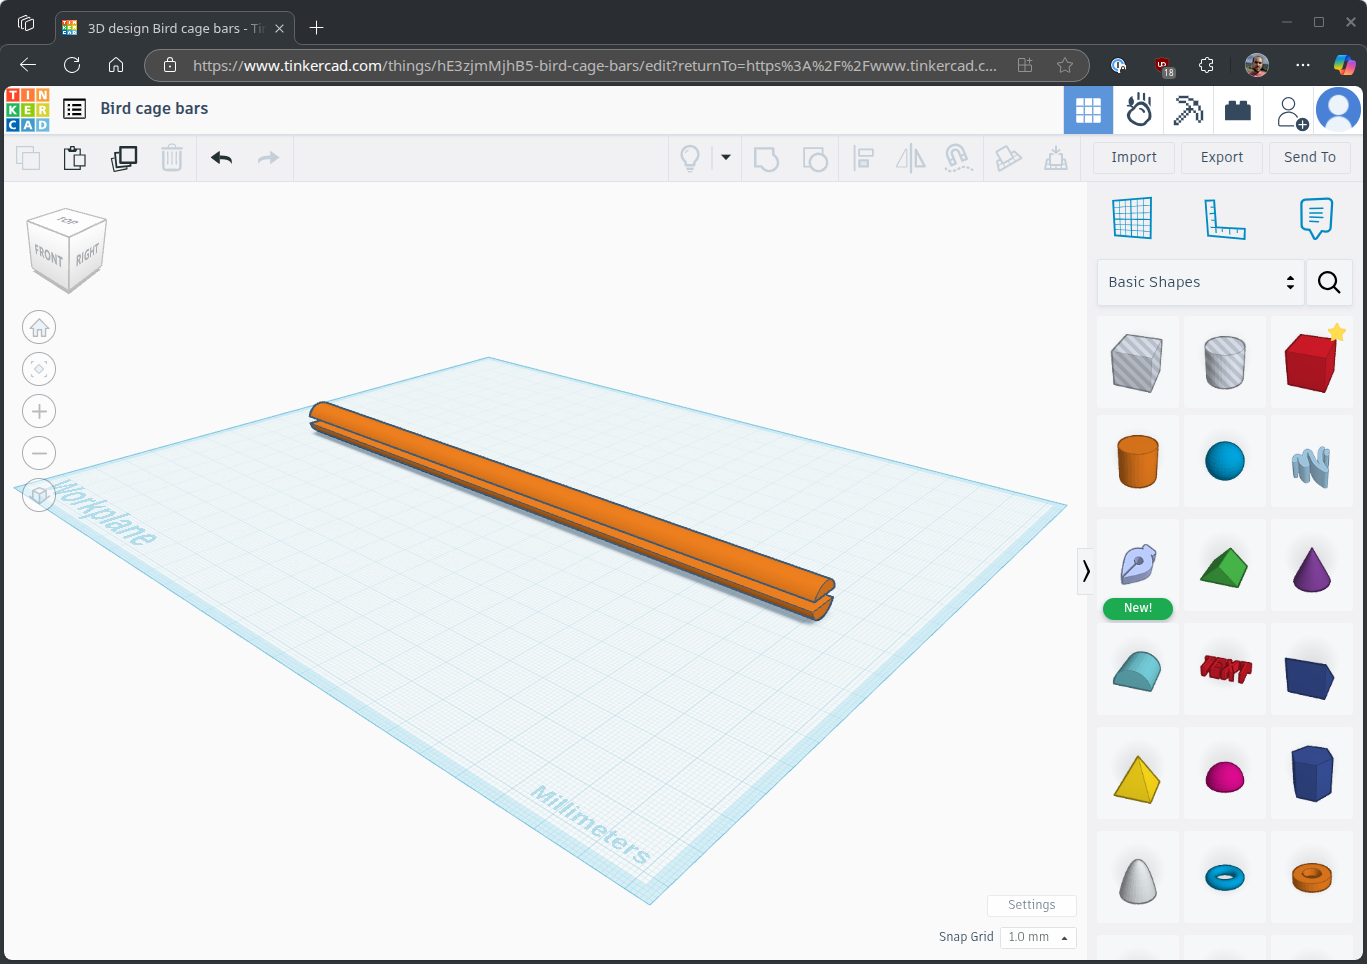
Simple TinkerCAD project showing the design of a bar for a bird cage. OpenSCAD is a scriptable CAD application where you write code to generate your model. Interestingly, I only came across this program because KDE’s Discover app mentioned it to me when I searched for “CAD”, not because I saw it recommended in any 3D printing-related forums. If you have ever used POV-Ray before, you know what this is about, and to be honest, the idea behind scripting the models sounds really tempting. But that’s where I left it.
There are several more options out there so go explore them if none of these satisfy you. My personal suggestion is that you start with TinkerCAD to quickly get something out of your printer and scratch your itch. But, as soon as you get into designing anything “moderately complex”, that you watch a couple of introductory videos for FreeCAD to rip the band-aid off and use a real application. I’ve started doing that now and the “parametric” aspects of FreeCAD make me feel much more confident that my creations will work out and that they’ll not be messed up by me touching “the wrong mouse button”.
With software out of the way, let’s move to the fact that 3D models are just that: conceptual models that only exist on the computer. When you want to bring those to reality, you need to account for the constraints that 3D printing brings. Here are some:
Layered plastic deposition. This concept is the key to designing something you can actually print. A 3D printer works by melting filament (a long string of plastic) and depositing such plastic horizontally on top of another surface. Objects are printed layer by layer, starting from the layer that touches the bed and moving up the Z axis. Which means that… some shapes are impossible to print! If your model has any overhang larger than maybe a couple millimeters, you can’t print it—unless you add superfluous support structures that need to be removed later.
Colors… or lack thereof. While it is certainly possible to print objects with multiple colors on them, the printer add-on to auto-switch colors is pretty expensive, and even if you buy that, you’ll likely be bound to a limited set (4, maybe 8) anyway. This means you have to design your model as separate pieces and perform some post-processing if you need multiple colors. You can combine different colors in one print if they are isolated to different layers though—but as you can imagine, manually switching colors half-way through a print is going to be annoying.
Warping. Matter shrinks as it cools, and you may end up in the situation that your print shrinks and warps as it cools down. This has happened to me a few times already and it was obviously annoying and not something I was expecting. You need to be aware that this can happen and design your model accordingly. I’ve seen various suggestions online but haven’t put them in practice yet, so I have nothing to suggest here.
These constraints are just the very minimum. I’ll leave you with this excellent 80-minute guide on designing for 3D printing written by Rahix, which covers these topics and more to try to get to a good print on the first try.
Step 2: Slicing
Let’s say you are done creating your 3D model. Can you send it to the printer? No! The printer doesn’t know anything about “3D models”: it only knows about Logo-like instructions—known as G-Code—that tell it how to operate on a layer by layer basis. The process of converting your 3D model to G-Code is called slicing and is performed by a slicer application.
The slicer takes the model as an input, “slices” through it on the horizontal plane to generate very fine layers, and then produces G-Code to make the printer operate the extruder (the word for the part that melts filament and deposits it on the printing plane) across the plane of every layer. The output of the slicer is a G-Code file which contains such instructions in detail, and this is the file that can be fed to the printer.
This slicing step is very interesting and is also where you’ll typically mess things up (assuming you got a 3D printable design in the first place) because of the myriad parameters that exist.
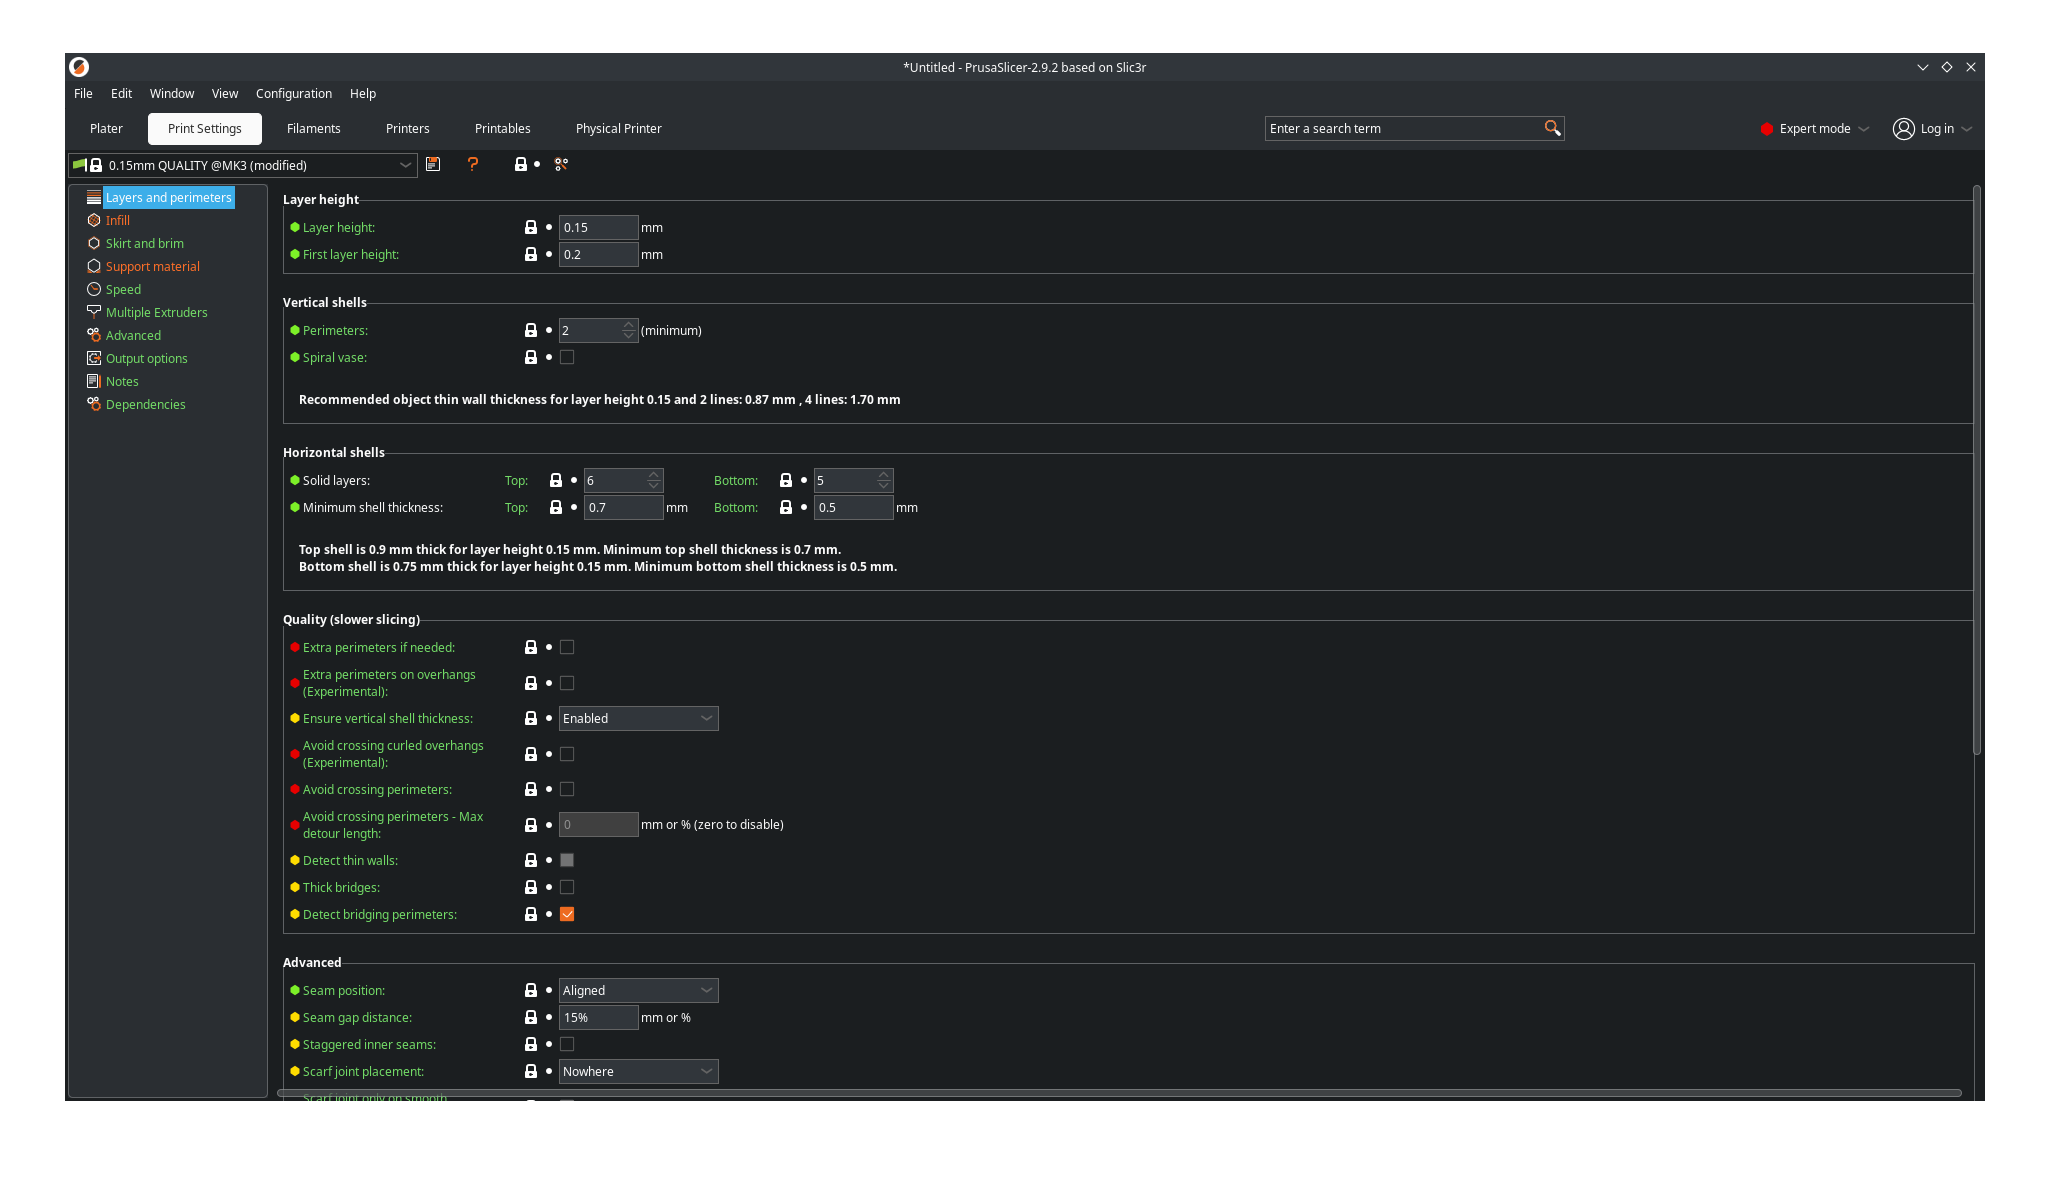
During slicing you’ll do things like:
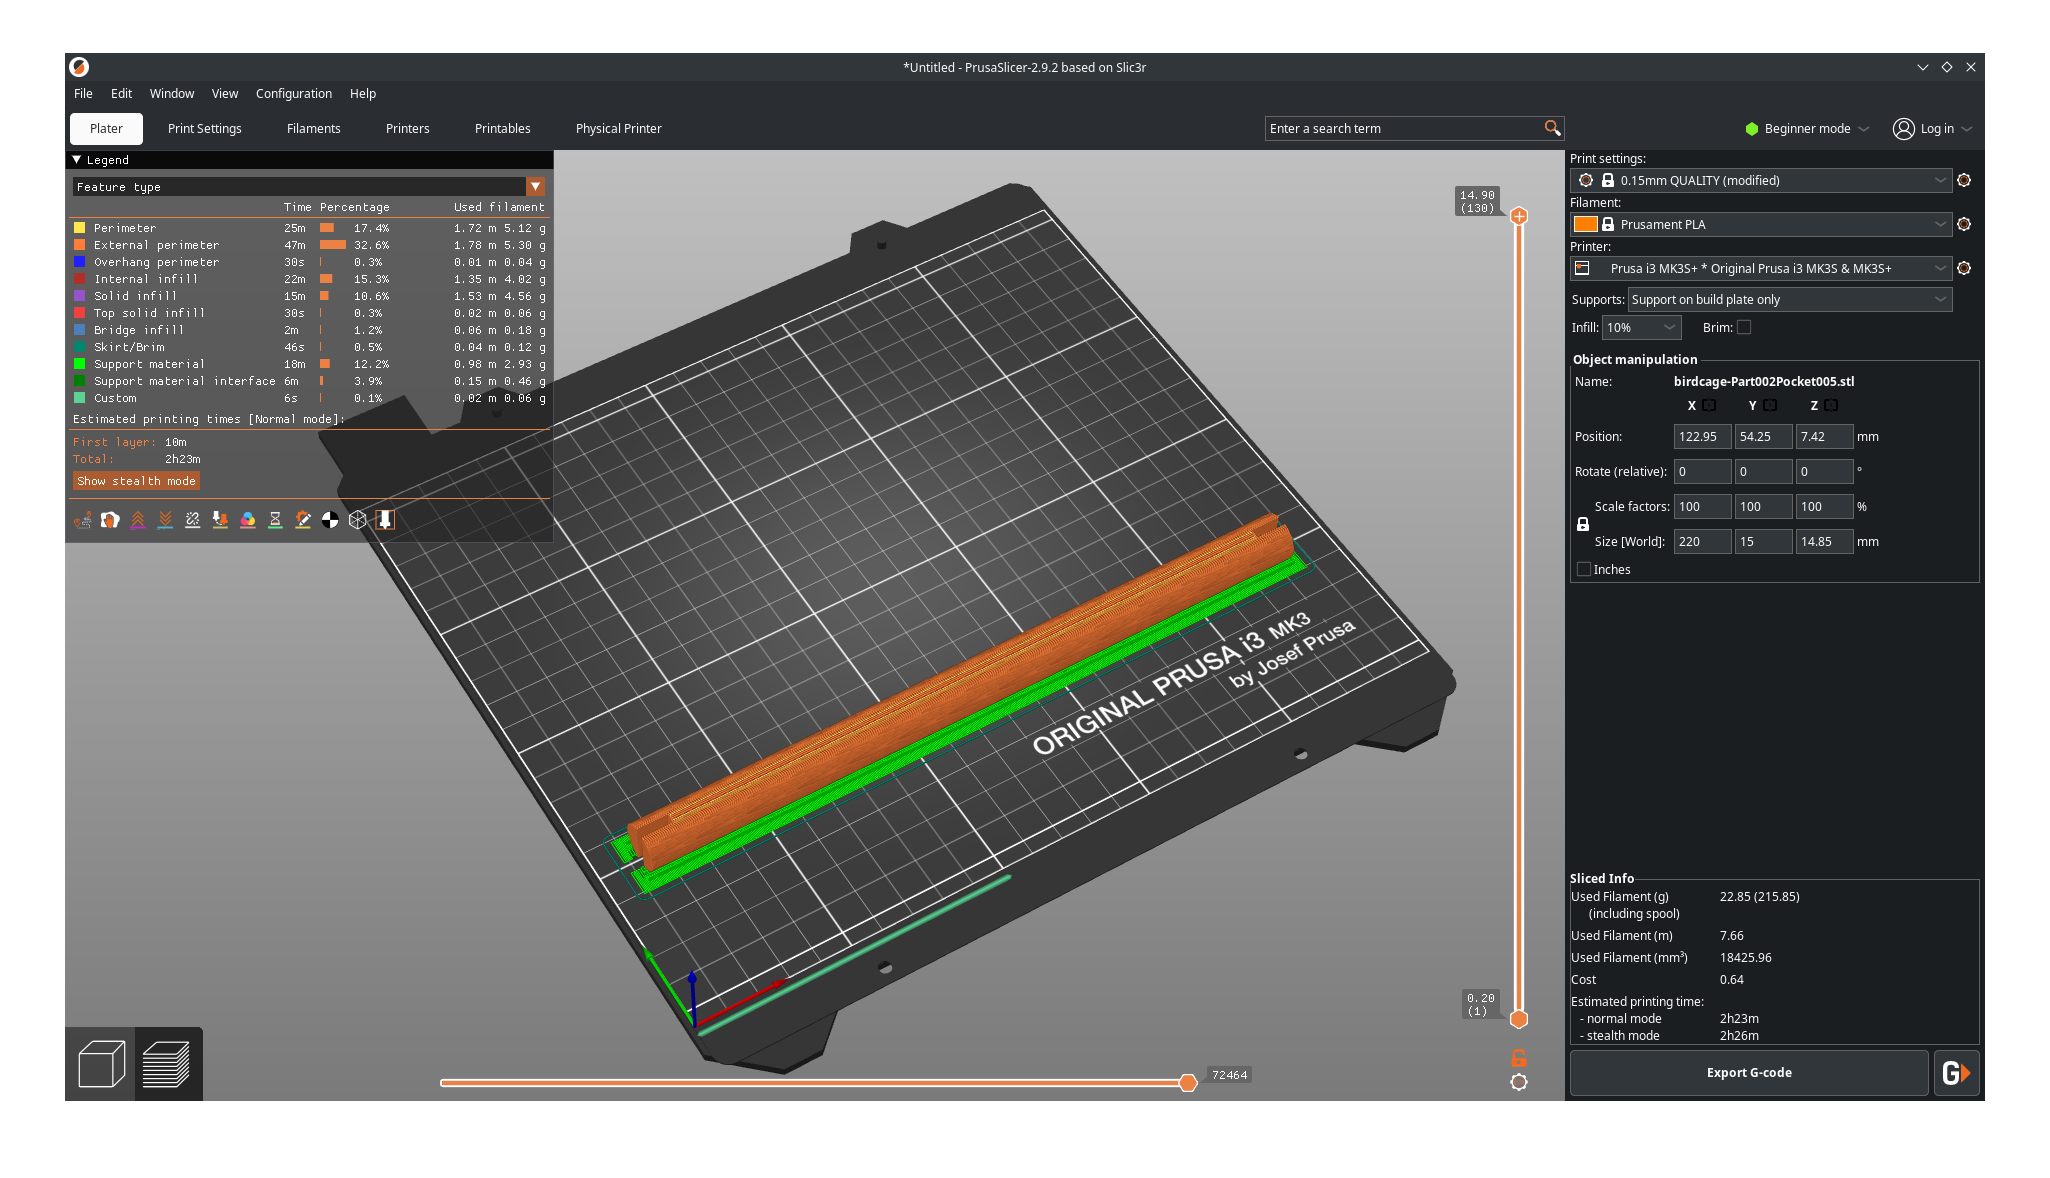
Laying out your model on the printing bed, possibly combining multiple objects to print them in one go and rotating them so that they can be printed.
Adjusting settings like the infill, which tells the printer how much plastic to use in the “inner” parts of the object: more infill means a sturdier object, but also a more expensive and slower to print object.
Asking the slicer to auto-generate a brim (an extra support structure on the base layer that increases bed adhesion), to add support structures for overhangs, or to add “mouse ears” to help with adhesion.
Choosing the type of filament to use and its properties.
Selecting the right printer (because the G-Code instructions are printer-specific, as you can imagine).
Configuring whether you want to switch colors half-way through the print or not.
And a long list of etceteras. The nice thing is that the slicer detects various problematic conditions and offers to resolve them before sending the output to the printer—but the bad thing is that it doesn’t detect everything, and some of the choices it makes are maybe-not-so-great. For example, if you ask the slicer to add support structures for overhangs, it may generate structures that you don’t like or that are harder to remove later on, whereas if you manually adjust the model to contain such structures, you have more control over the results.
As for which pieces of software exist for slicing, every printer comes with its own slicer software. In my case, I’ve been using PrusaSlicer which is the one that matches my printer and is open source. And because PrusaSlicer is open source… you can imagine that other companies have taken it as the basis for their own printers, like Bambu Lab has done with their Bambu Studio.
Step 3: Printing
And finally, we come to the printing process itself. Once you send the G-Code to the printer, the printer starts by heating up the extruder and the bed. You need a hot extruder to melt the filament, and you need a hot bed to help the filament attach to the printing surface. The printer then performs mesh bed leveling (which not all printers do) to understand subtle variations in the height of the bed across its surface. And then the printer starts moving the extruder on the XY plane to generate the object one layer at a time. It is fascinating to watch; look:
But… how do you send the G-Code to the printer? Well, it depends on the printer. If you choose to go the Bambu Lab route, which is “the Apple of 3D printers” as a coworker put it to me (hey Daniel!), it’s simple: you click a button from their slicing app and boom, the printer starts working. No need to worry about file transfers and no need to worry about calibration steps; it just works. And in fact, if you look for recommendations online, most people will point you towards choosing one of these printers:
Bambu Lab A1 Mini: Maximum print volume of 180 x 180 x 180 mm.
Bambu Lab A1: Maximum print volume of 256 x 256 x 256 mm.
But do you know how Bambu Lab’s magic operation happens? Via a cloud service, “of course”. And if the cloud service is down, good luck printing: from what I could find, it seems like these printers cannot operate without a network connection. And if the printer requires a cloud service, then you also face all the usual privacy and security (or lack thereof) problems, with possibly some risky ones (malicious G-Code trying to make the printer malfunction, maybe?).
So, what are the alternatives? Well, there are a ton of them. Two machines from other vendors that pop up in almost all reviews are:
Prusa MK4S: This is the “entry level” machine from Prusa, another big brand in this space with similar price points to the well-regarded Bambu Lab machines.
Ender 3 V3: This is a much more affordable printer and comes from Creality.
Which one to pick? As a beginner, it’s difficult. I read many reviews online and, as I mention above, most people suggested to “just” choose Bambu Lab for its simplicity and beginner-friendliness to achieve good quality results. These reviewers highlighted that other machines require a lot of manual tinkering (which actually made them more appetizing to me) and also warned to stay clear of Creality due to quality and safety issues. And if you research deeper, you’ll start to realize that the way to “level up” in 3D printing is to build your own printer while 3D-printing some of its own pieces.
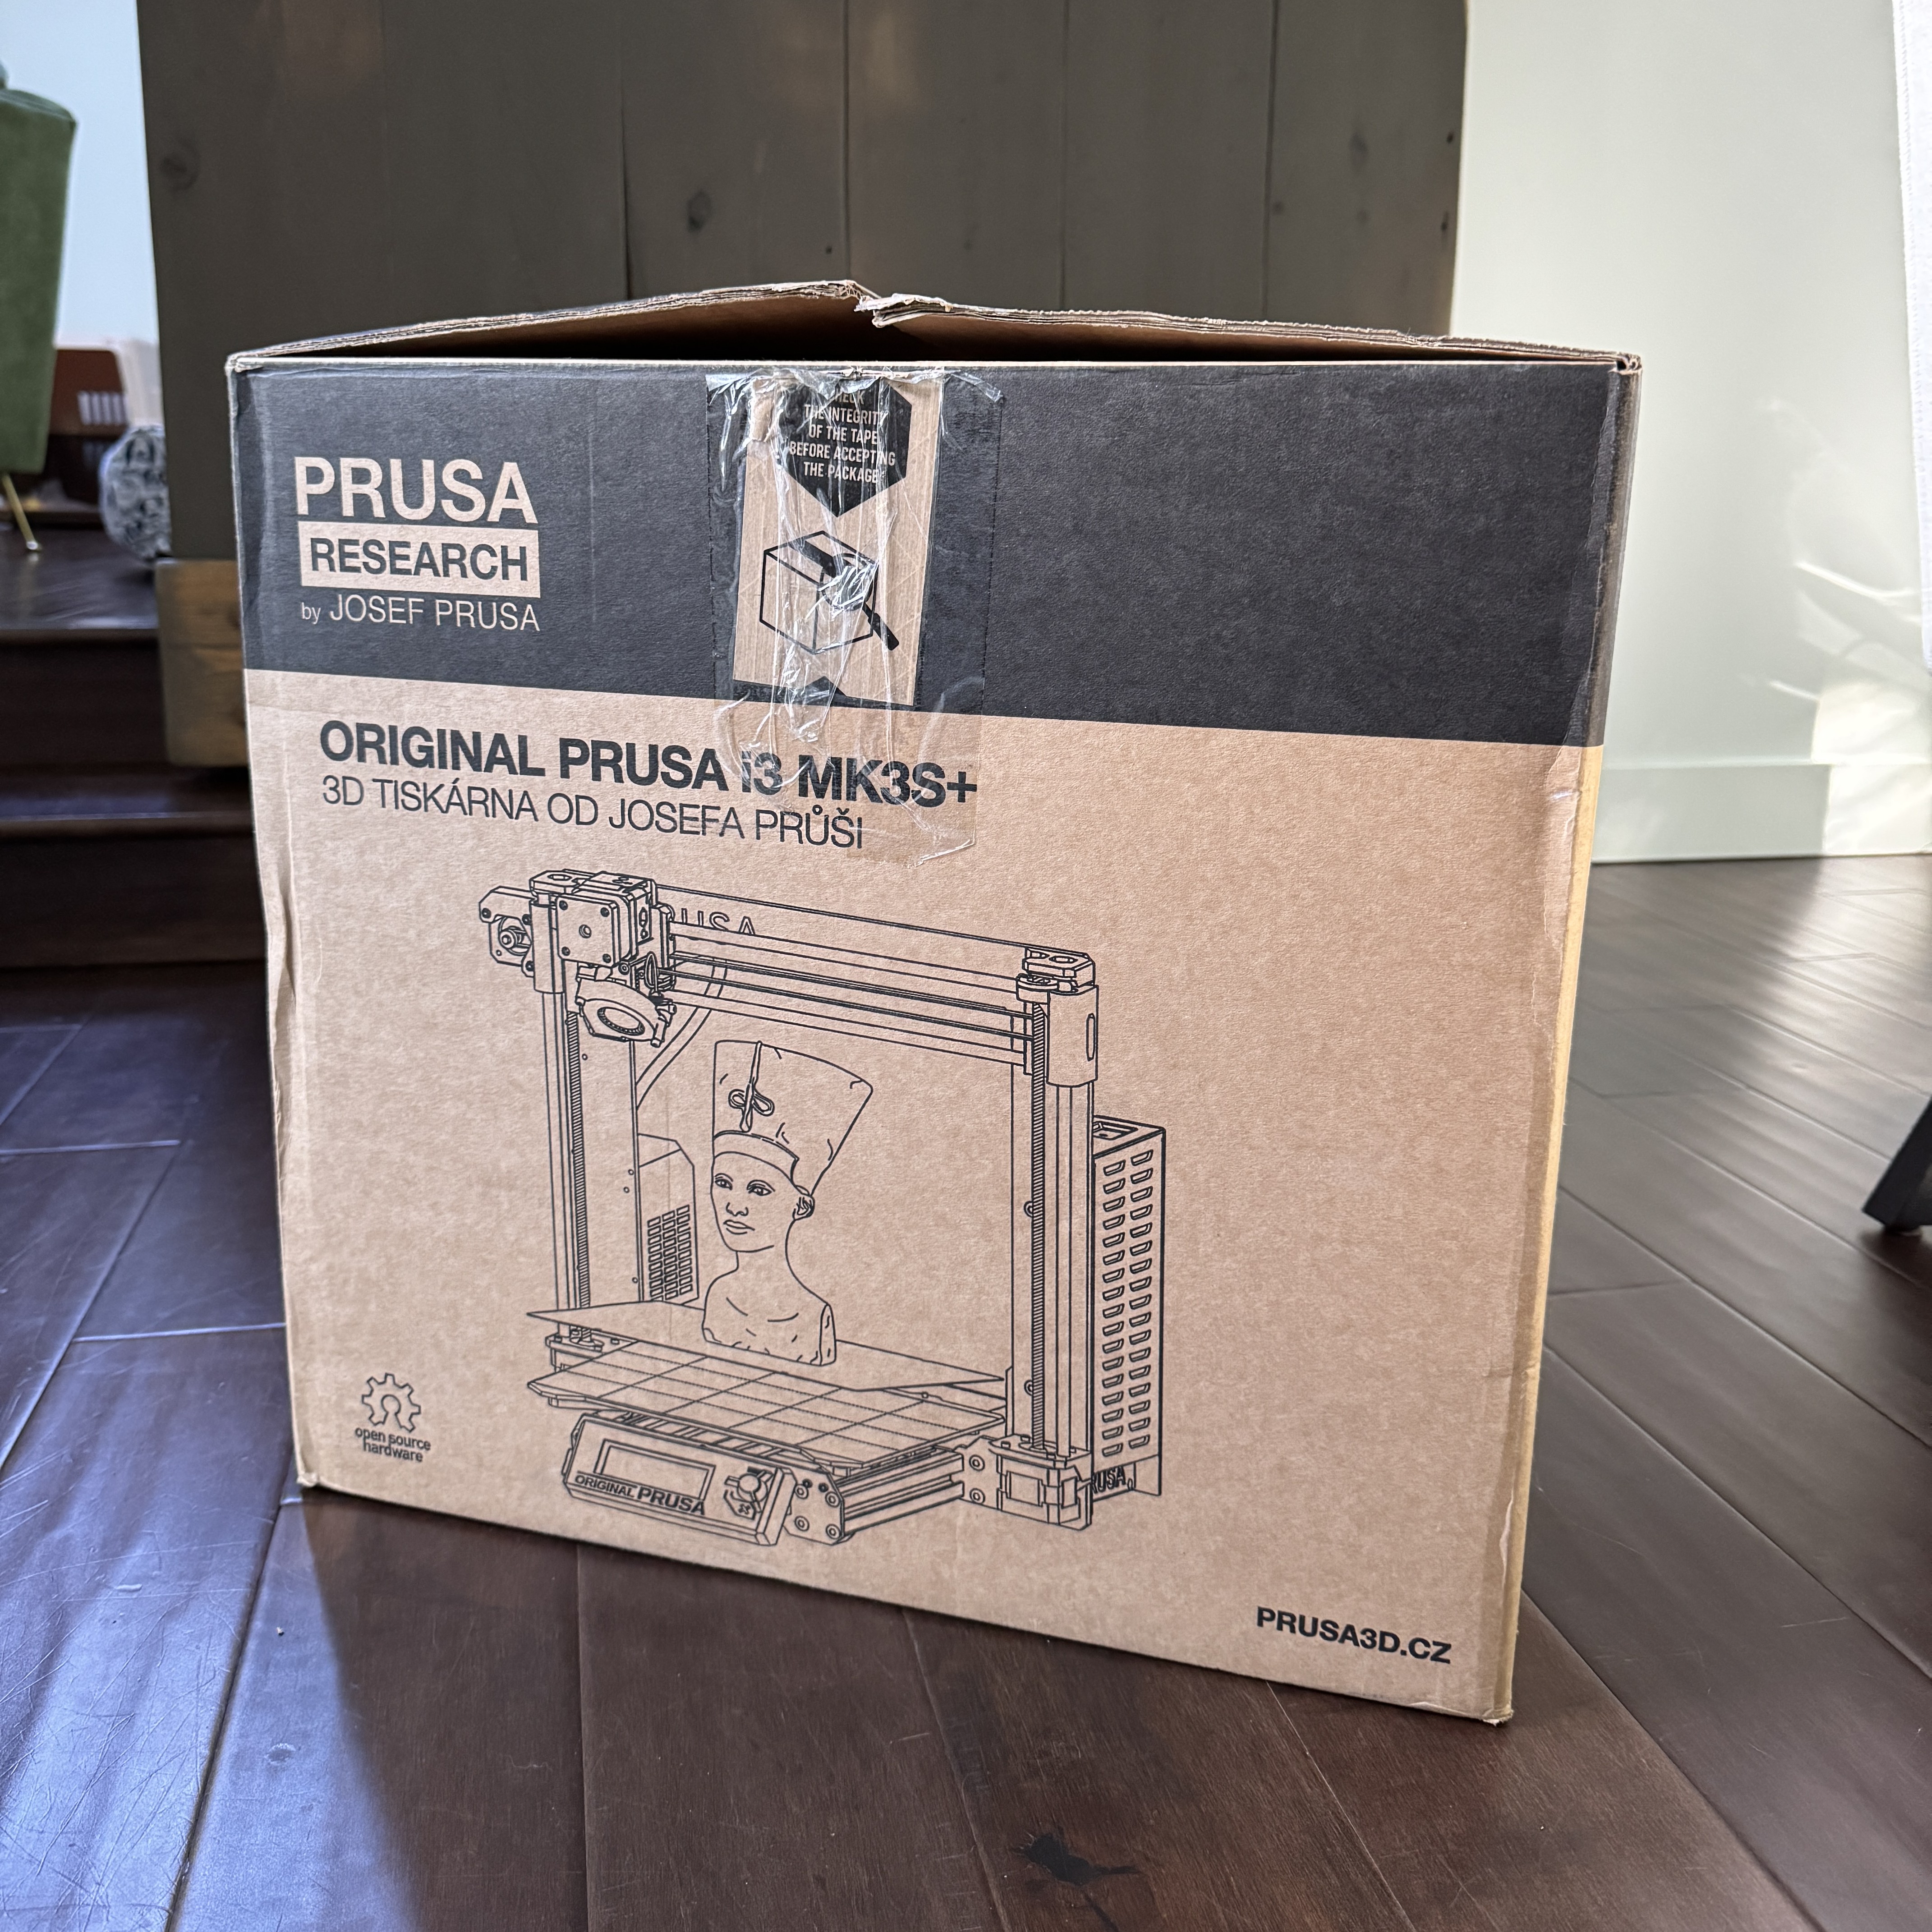
In the end, I chose to go the Prusa route, but the high prices put me off: after all, I’m just getting started and I do not need to make a huge investment in a “hobby” that may not last, so I got a second-hand, lightly-used Prusa i3 MK3S+ for a fraction of the price of a new one. And then the surprises started: the printer has zero network connectivity. This was a bit unexpected (I somehow assumed it’d offer local-only network printing), but in the end turned out to be great because this means that there is zero cloud garbage involved in the printing process. The printer just has an SD card slot and a USB port, so I plugged the latter into a computer running PrusaSlicer and… nothing. PrusaSlicer did not have any option to actually print to the physically-attached printer. Weird.
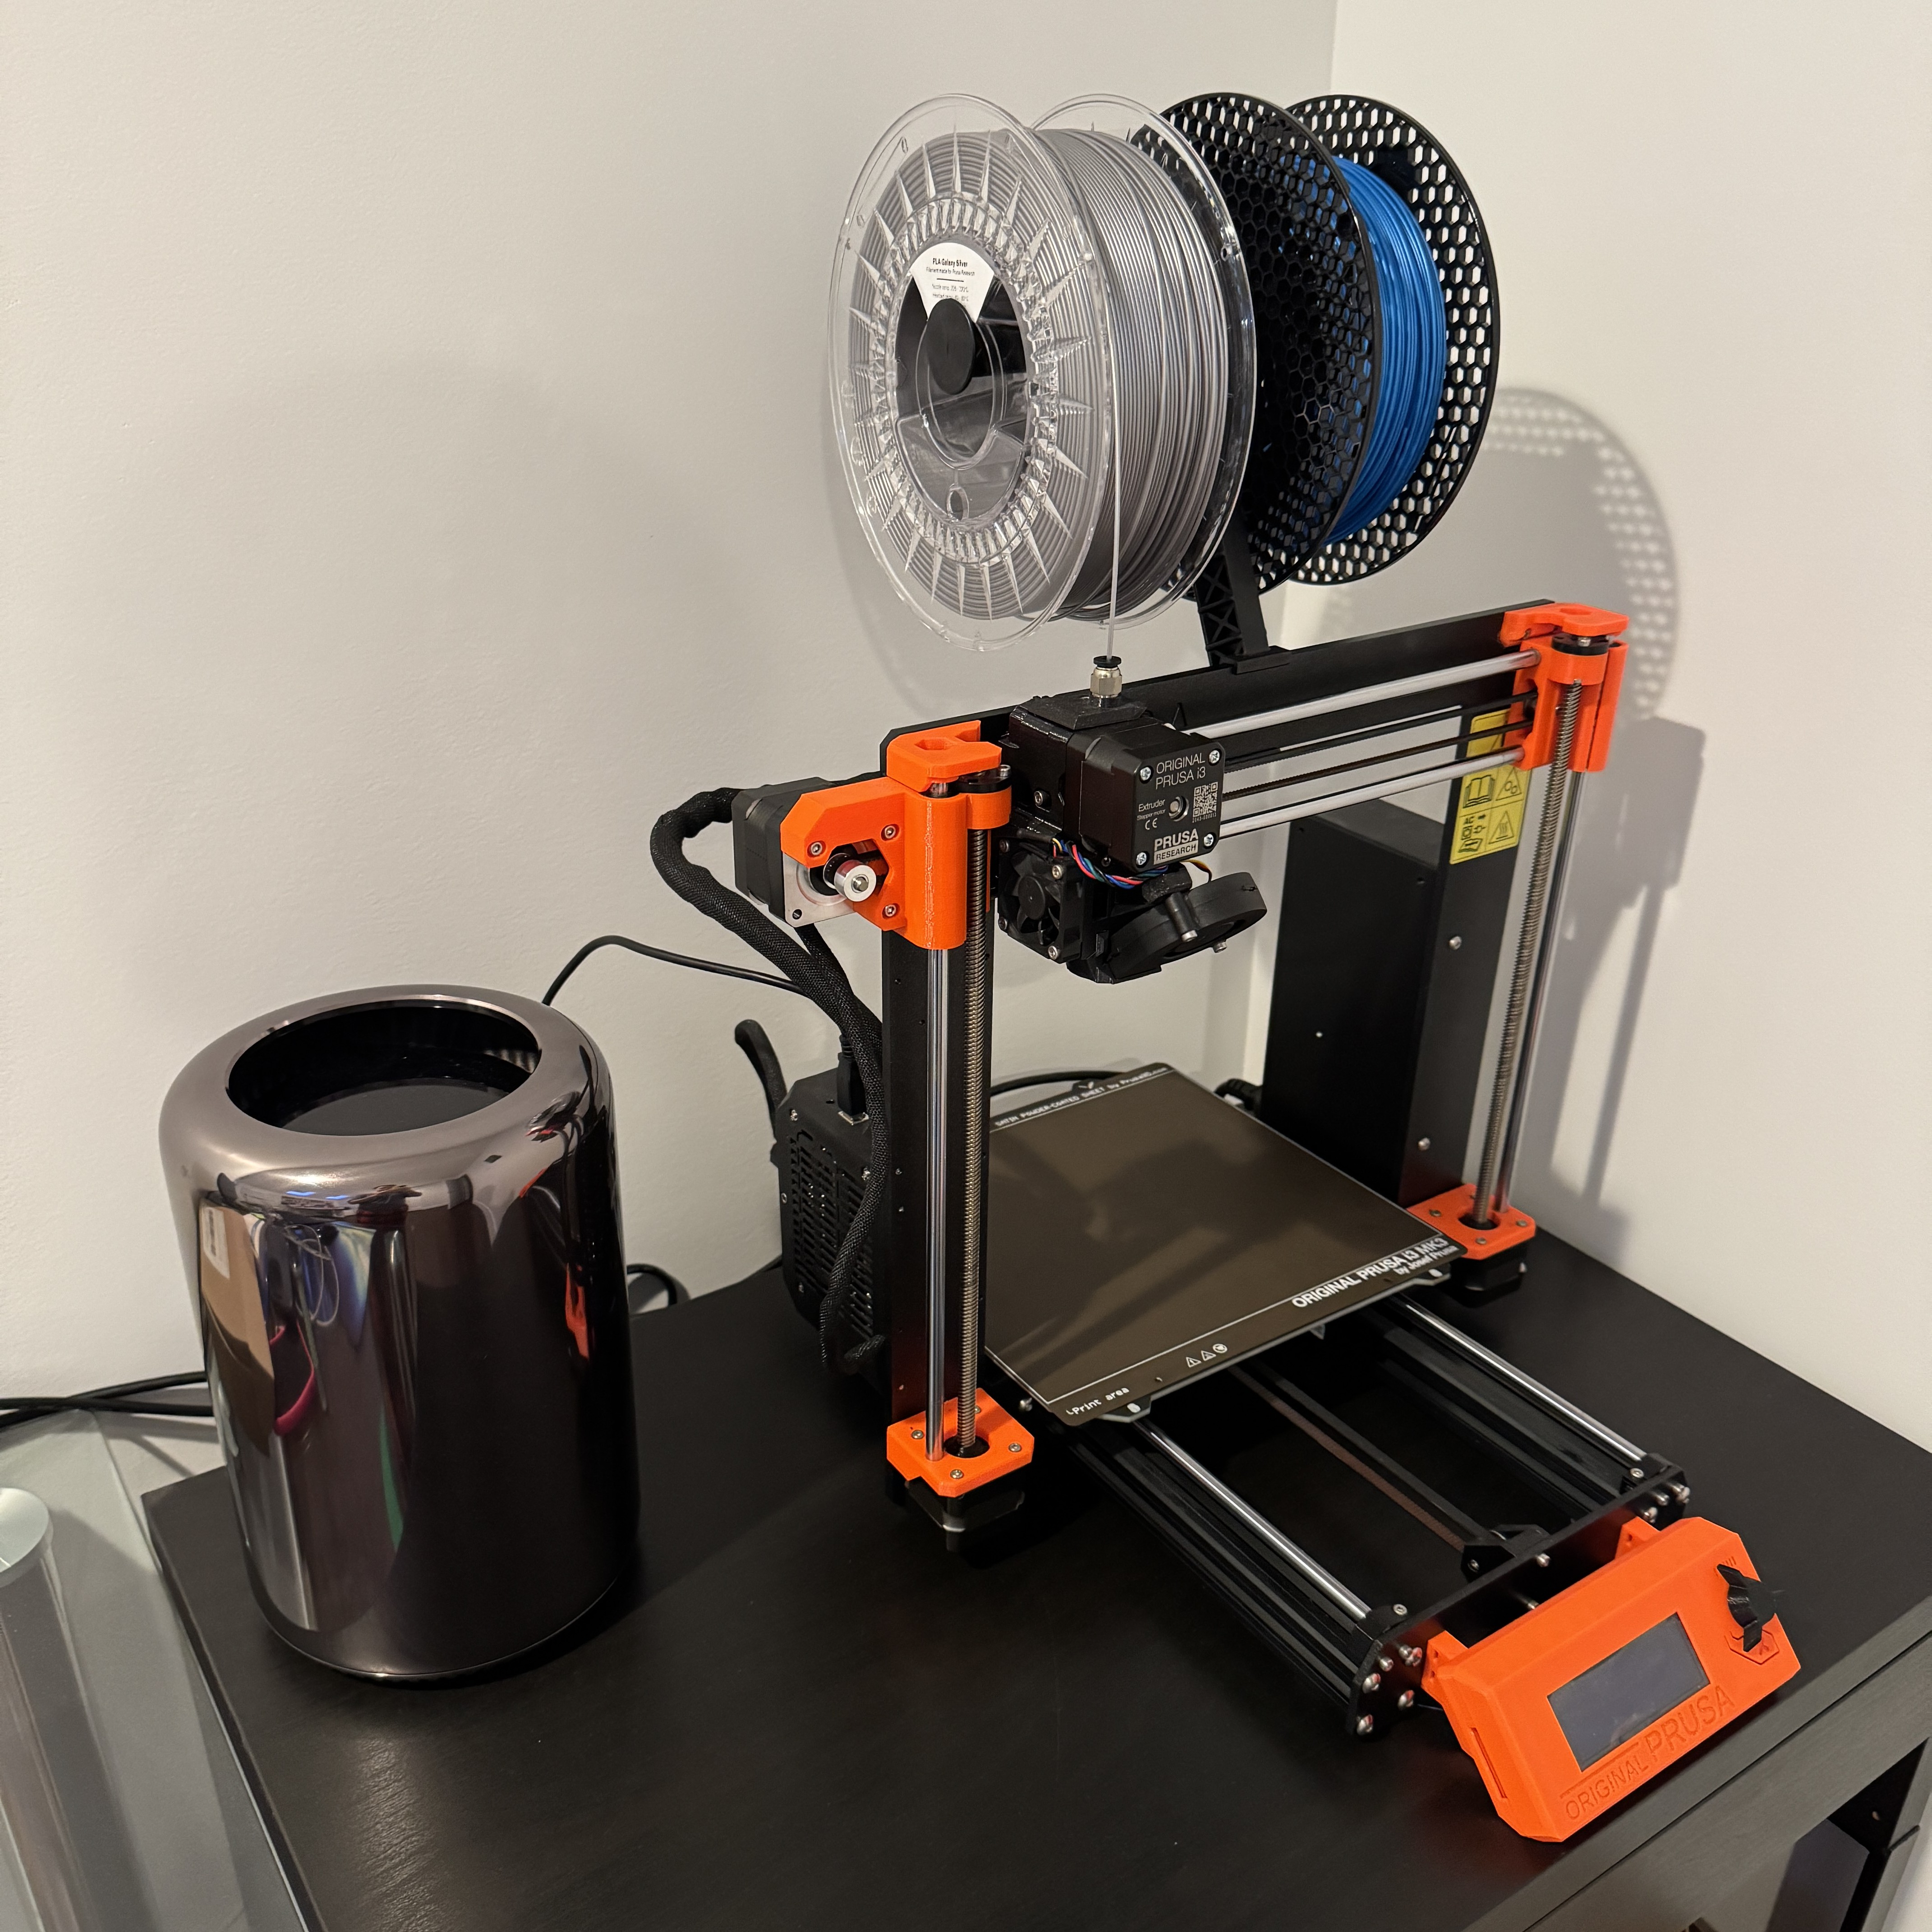
As it turns out, you need a print server to actually control the machine from its USB port. Researching this topic online will almost certainly convince you that you need OctoPi running on a Raspberry Pi in order to print. But… a Pi is just a computer, so whatever OctoPi does can also be done on a Linux machine—the Mac Pro I had already connected to the printer in the picture right above. And indeed that’s the case: once I installed OctoPrint, I could connect to the printer and drive it. (What’s more, it is possible to add a “physical printer” to the PrusaSlicer, but all PrusaSlicer will do is embed the print server’s web interface.)
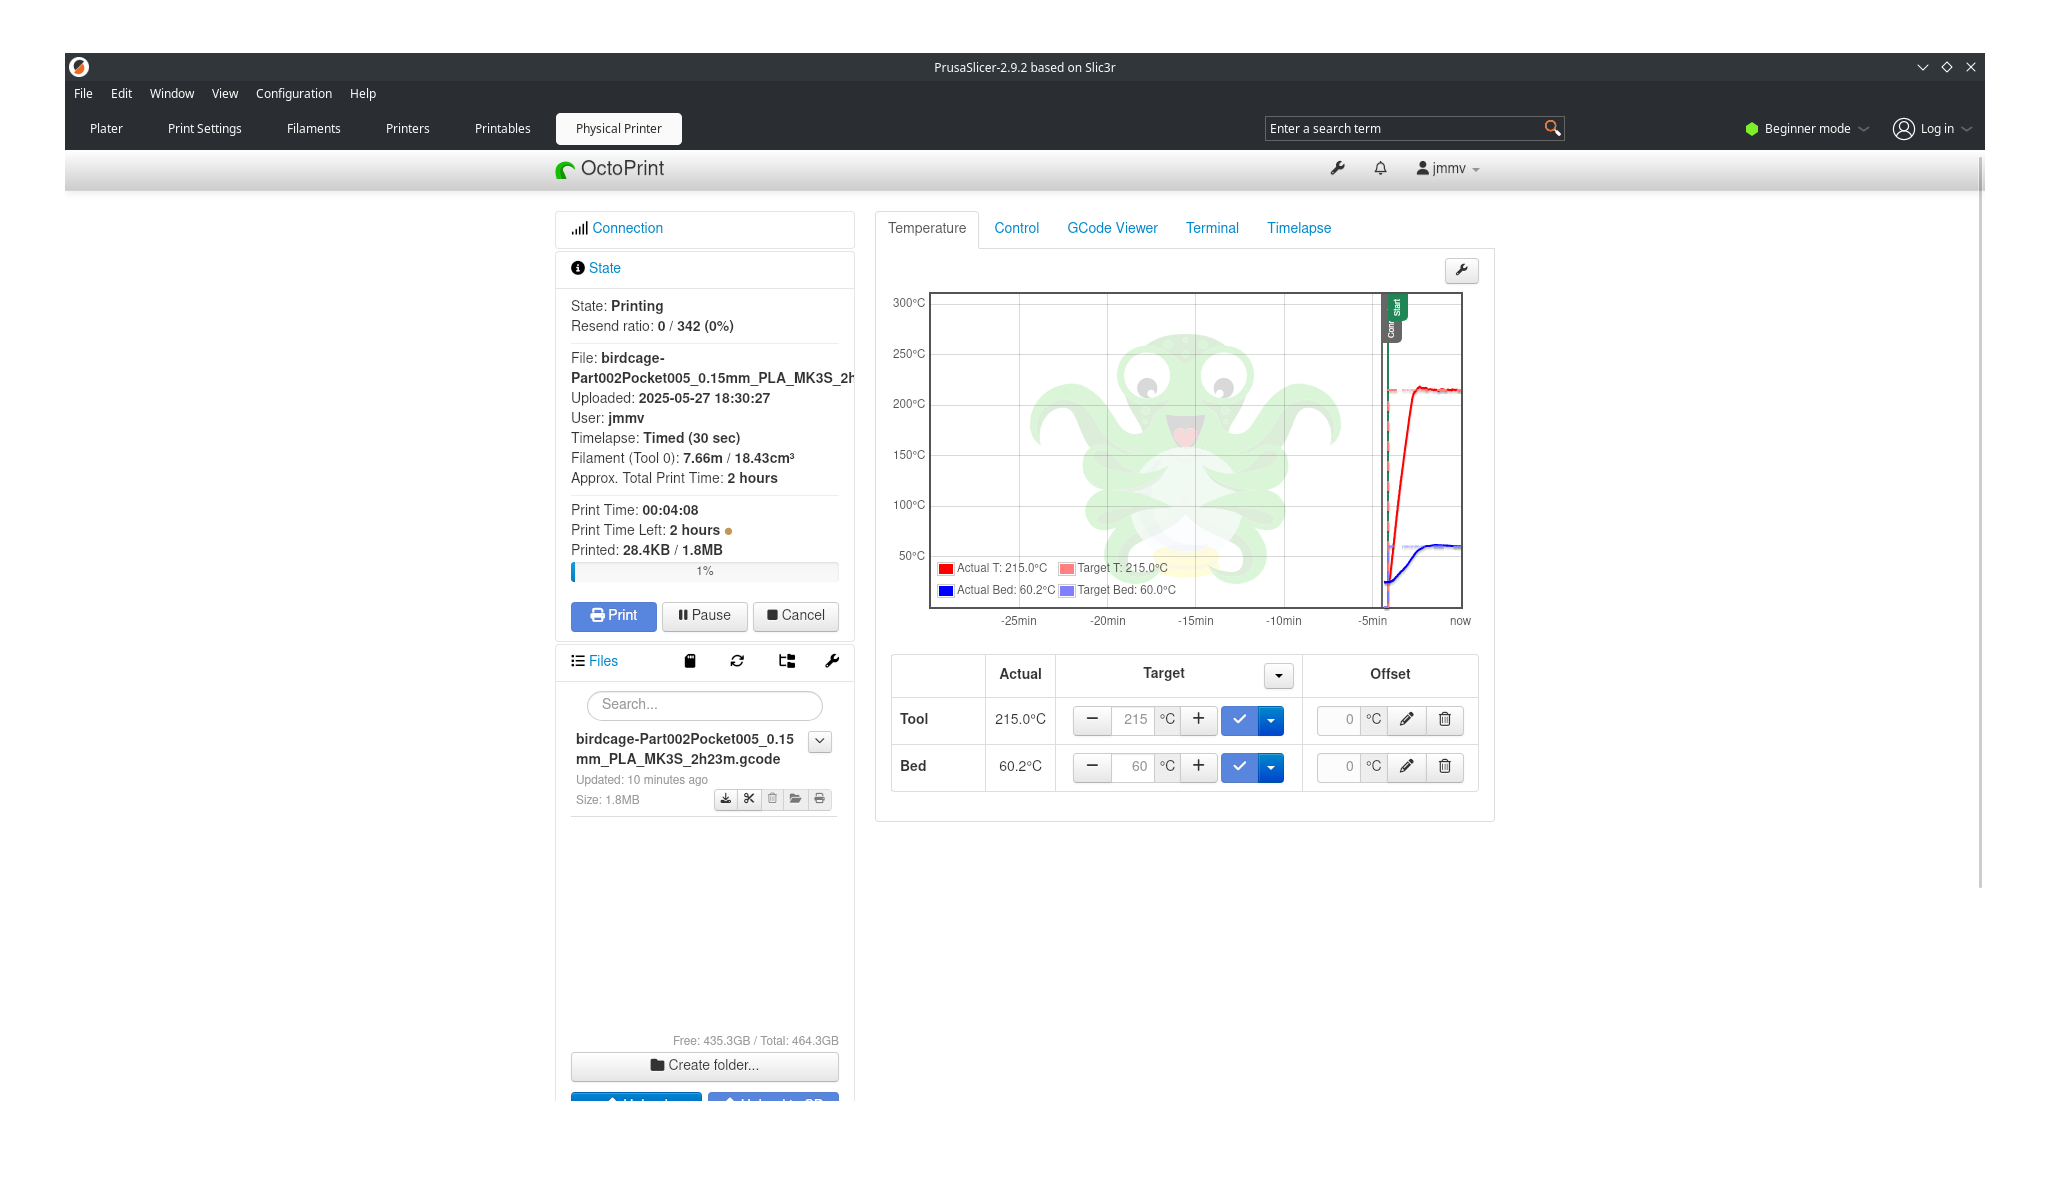
OctoPrint itself is “the CUPS of 3D printing”. It’s a piece of software that knows how to send the G-Code to the printer via its USB connection, but it’s also a system that queues print jobs, provides monitoring and G-Code inspection features, allows for timelapse recording via a webcam, and much more. It feels overkill to be honest, but it does the job and there don’t seem to be any simpler alternatives, so that’s what it is.
The very last thing to touch on regarding the printing process are the filament materials. The basic filament type is PLA, and it seems like it’s the easiest one to get started with. There are alternatives of different quality and properties out there for different applications, but that’s a world I haven’t explored yet.
And with that, you should now have the very basic knowledge to start creating your own objects and feel like a Real Engineer (like I did). Keep in mind that you don’t actually need to own a 3D printer though: there are on-demand print services available that will ship the prints back to you for cheap—but there is no getting around to learning CAD modeling within the constraints of 3D printing. I’d also recommend playing with the slicer software to understand the implications of certain choices in the model regarding printing limitations (the need for support structures and the like) and print times. In the end, I’m happy I got my own printer because of the various trial-and-error iterations I went through before getting some decent prints out.